
Sam and Alex's 2018 Revel — a great platform that deserves a better electrical system than it comes with from the factory.
The Problem with the Factory Revel Electrical
The Revel is one of the best-designed Class B campers on the market. The 4×4 capability, the bed lift, the garage — all excellent. The factory electrical system, however, is a serious weak point for anyone who wants to camp off-grid for more than a day or two.
Factory spec: one 80Ah AGM battery, 200W of solar through a PWM controller, 30A converter. That's roughly 50–60Ah of usable capacity (AGM shouldn't go below 50%), about 600Wh/day of solar generation in ideal conditions, and a controller that wastes 20–30% of available solar through inefficiency. For campground camping where you're plugging in every night, it's fine. For actual off-grid travel — national forests, BLM land, backcountry — it's inadequate.
What Was Replaced vs What Stayed
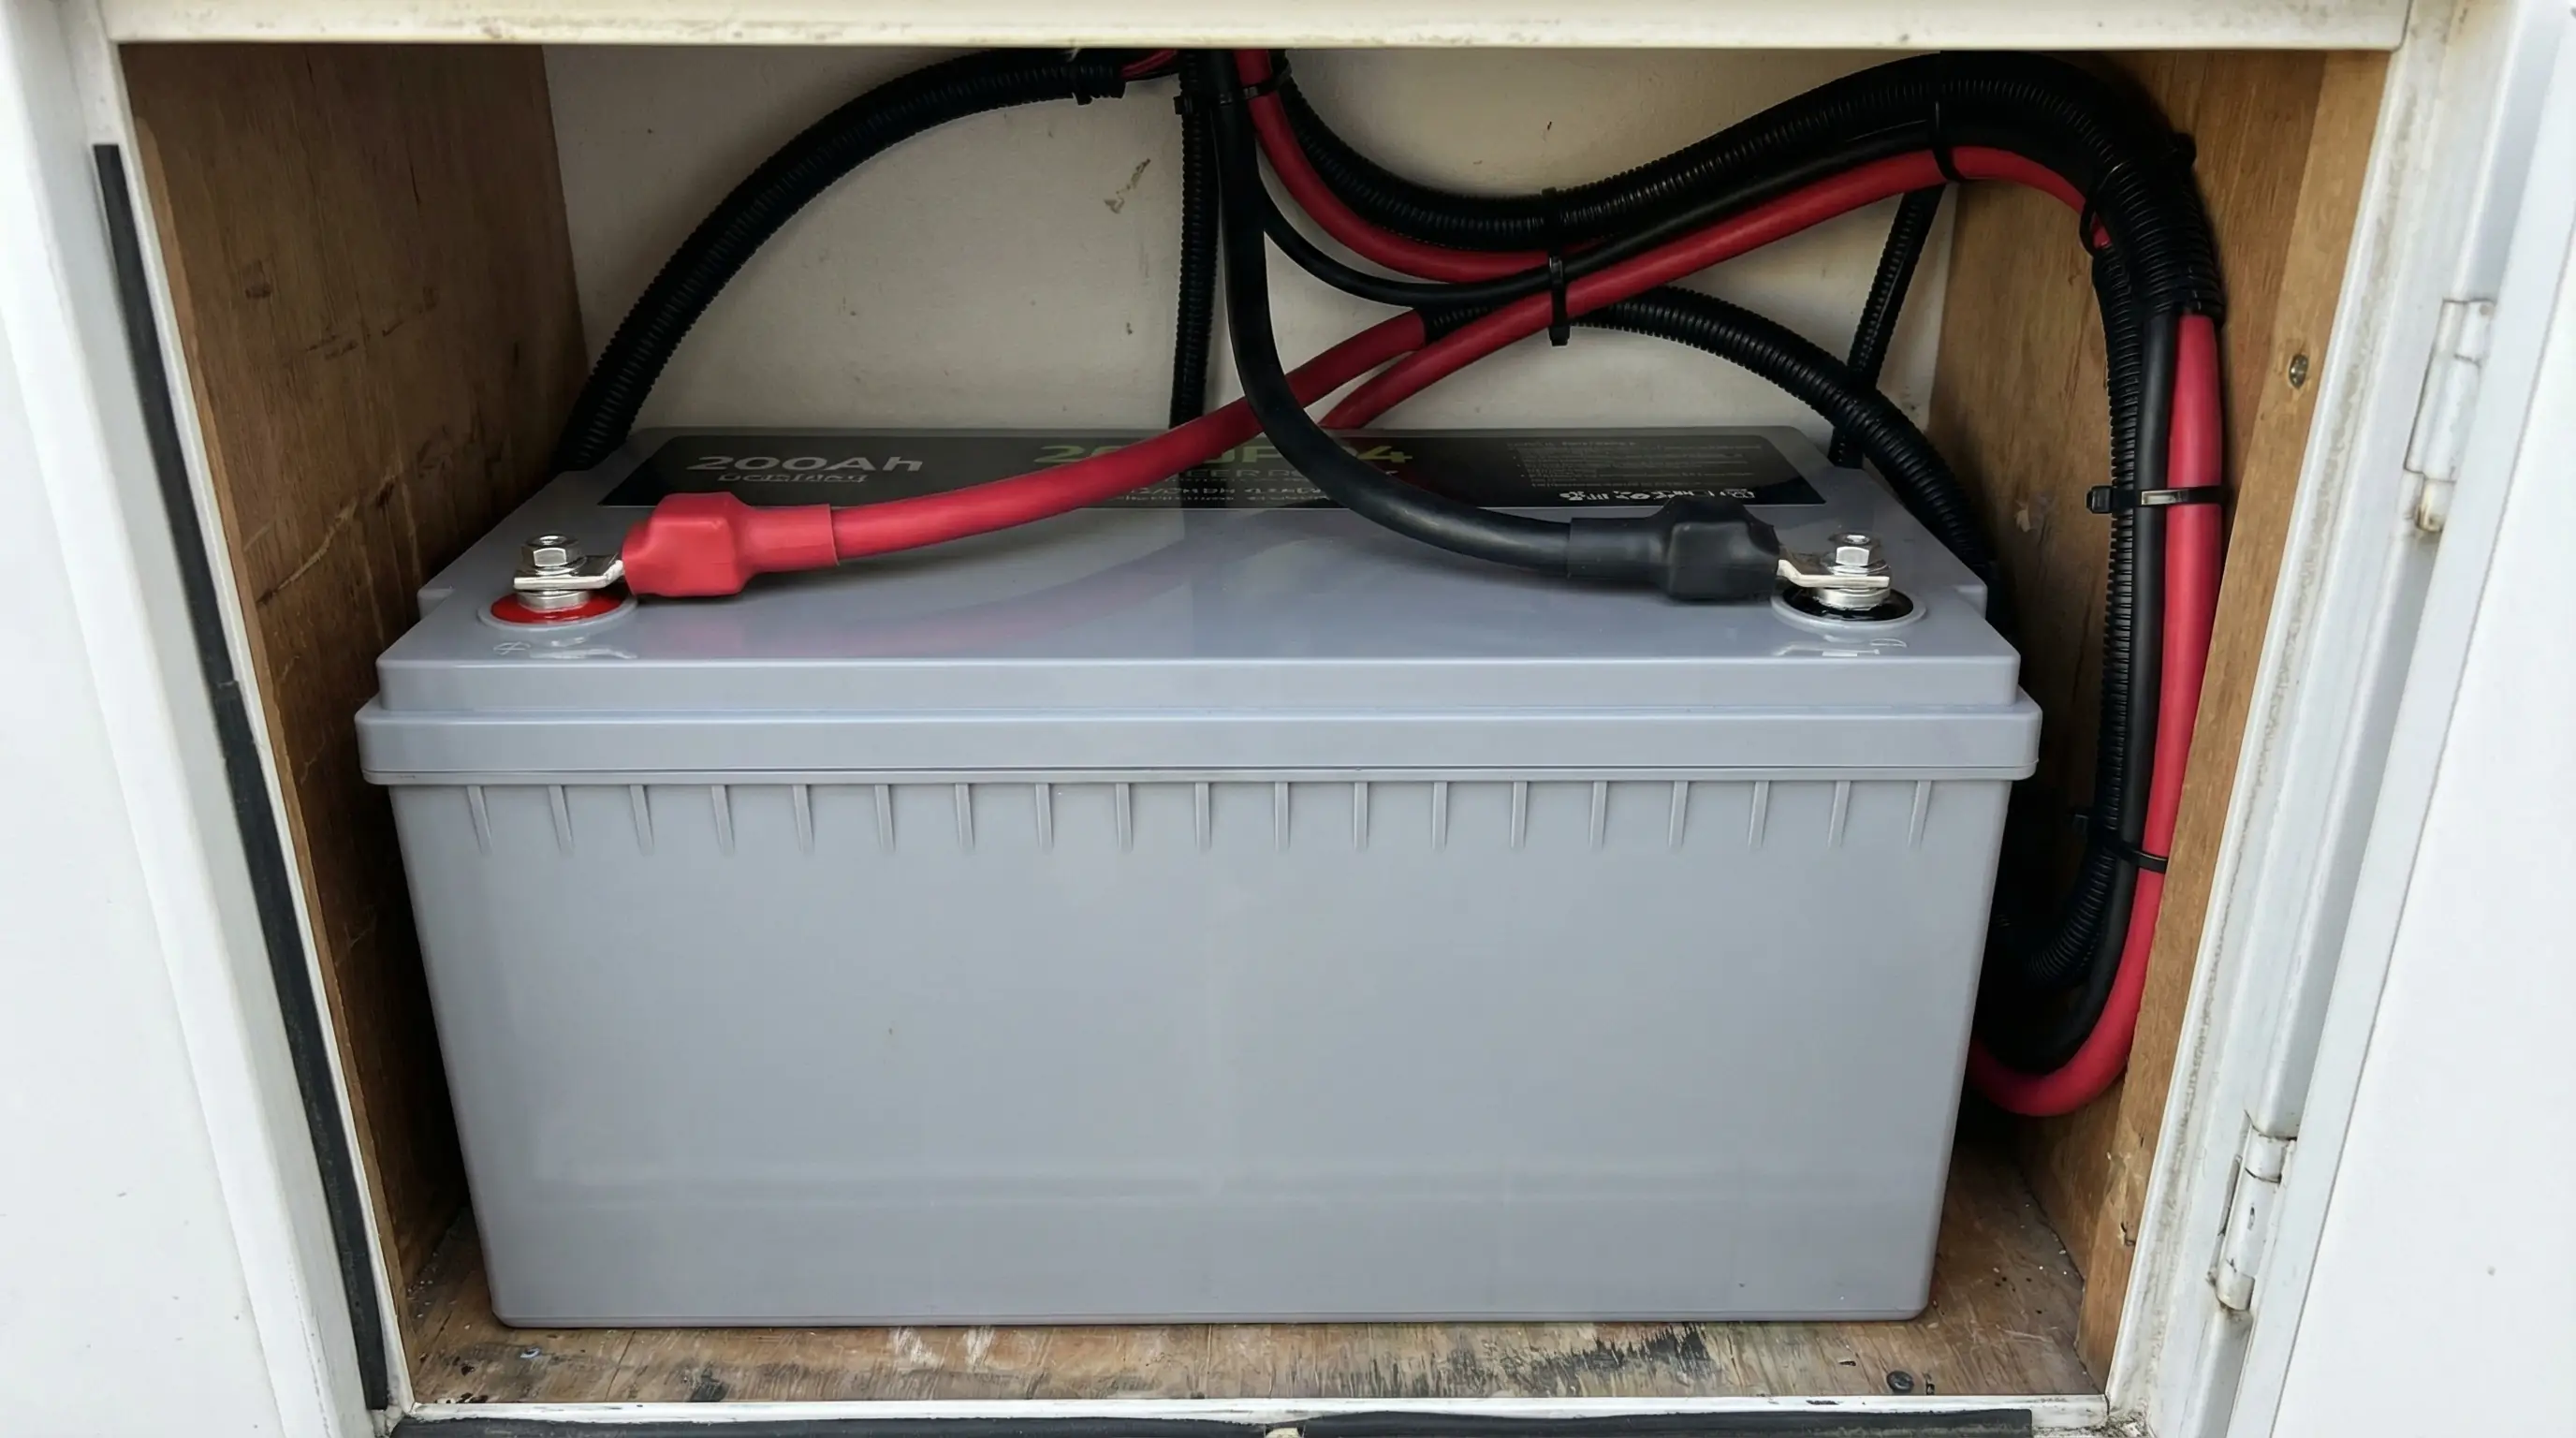
The Ampere Time 200Ah LiFePO4 fits the Revel battery compartment with about 2" of clearance — tight but clean.
The Battery Swap
The Revel battery compartment is sized for a Group 24 or Group 31 battery. The Ampere Time 200Ah LiFePO4 in Group 31 case size fits with minimal modification — just relocated one mounting bracket. Weight saving over the original AGM: 48 lbs. The lithium battery is 22 lbs; the factory AGM was 70 lbs.
Critical step: the factory Winnebago converter/charger must be reprogrammed to a lithium charging profile (14.4V absorption, 13.6V float) or it will overcharge the lithium battery. This is done via DIP switches on the WFCO converter — instructions are in the WFCO manual and took 10 minutes.
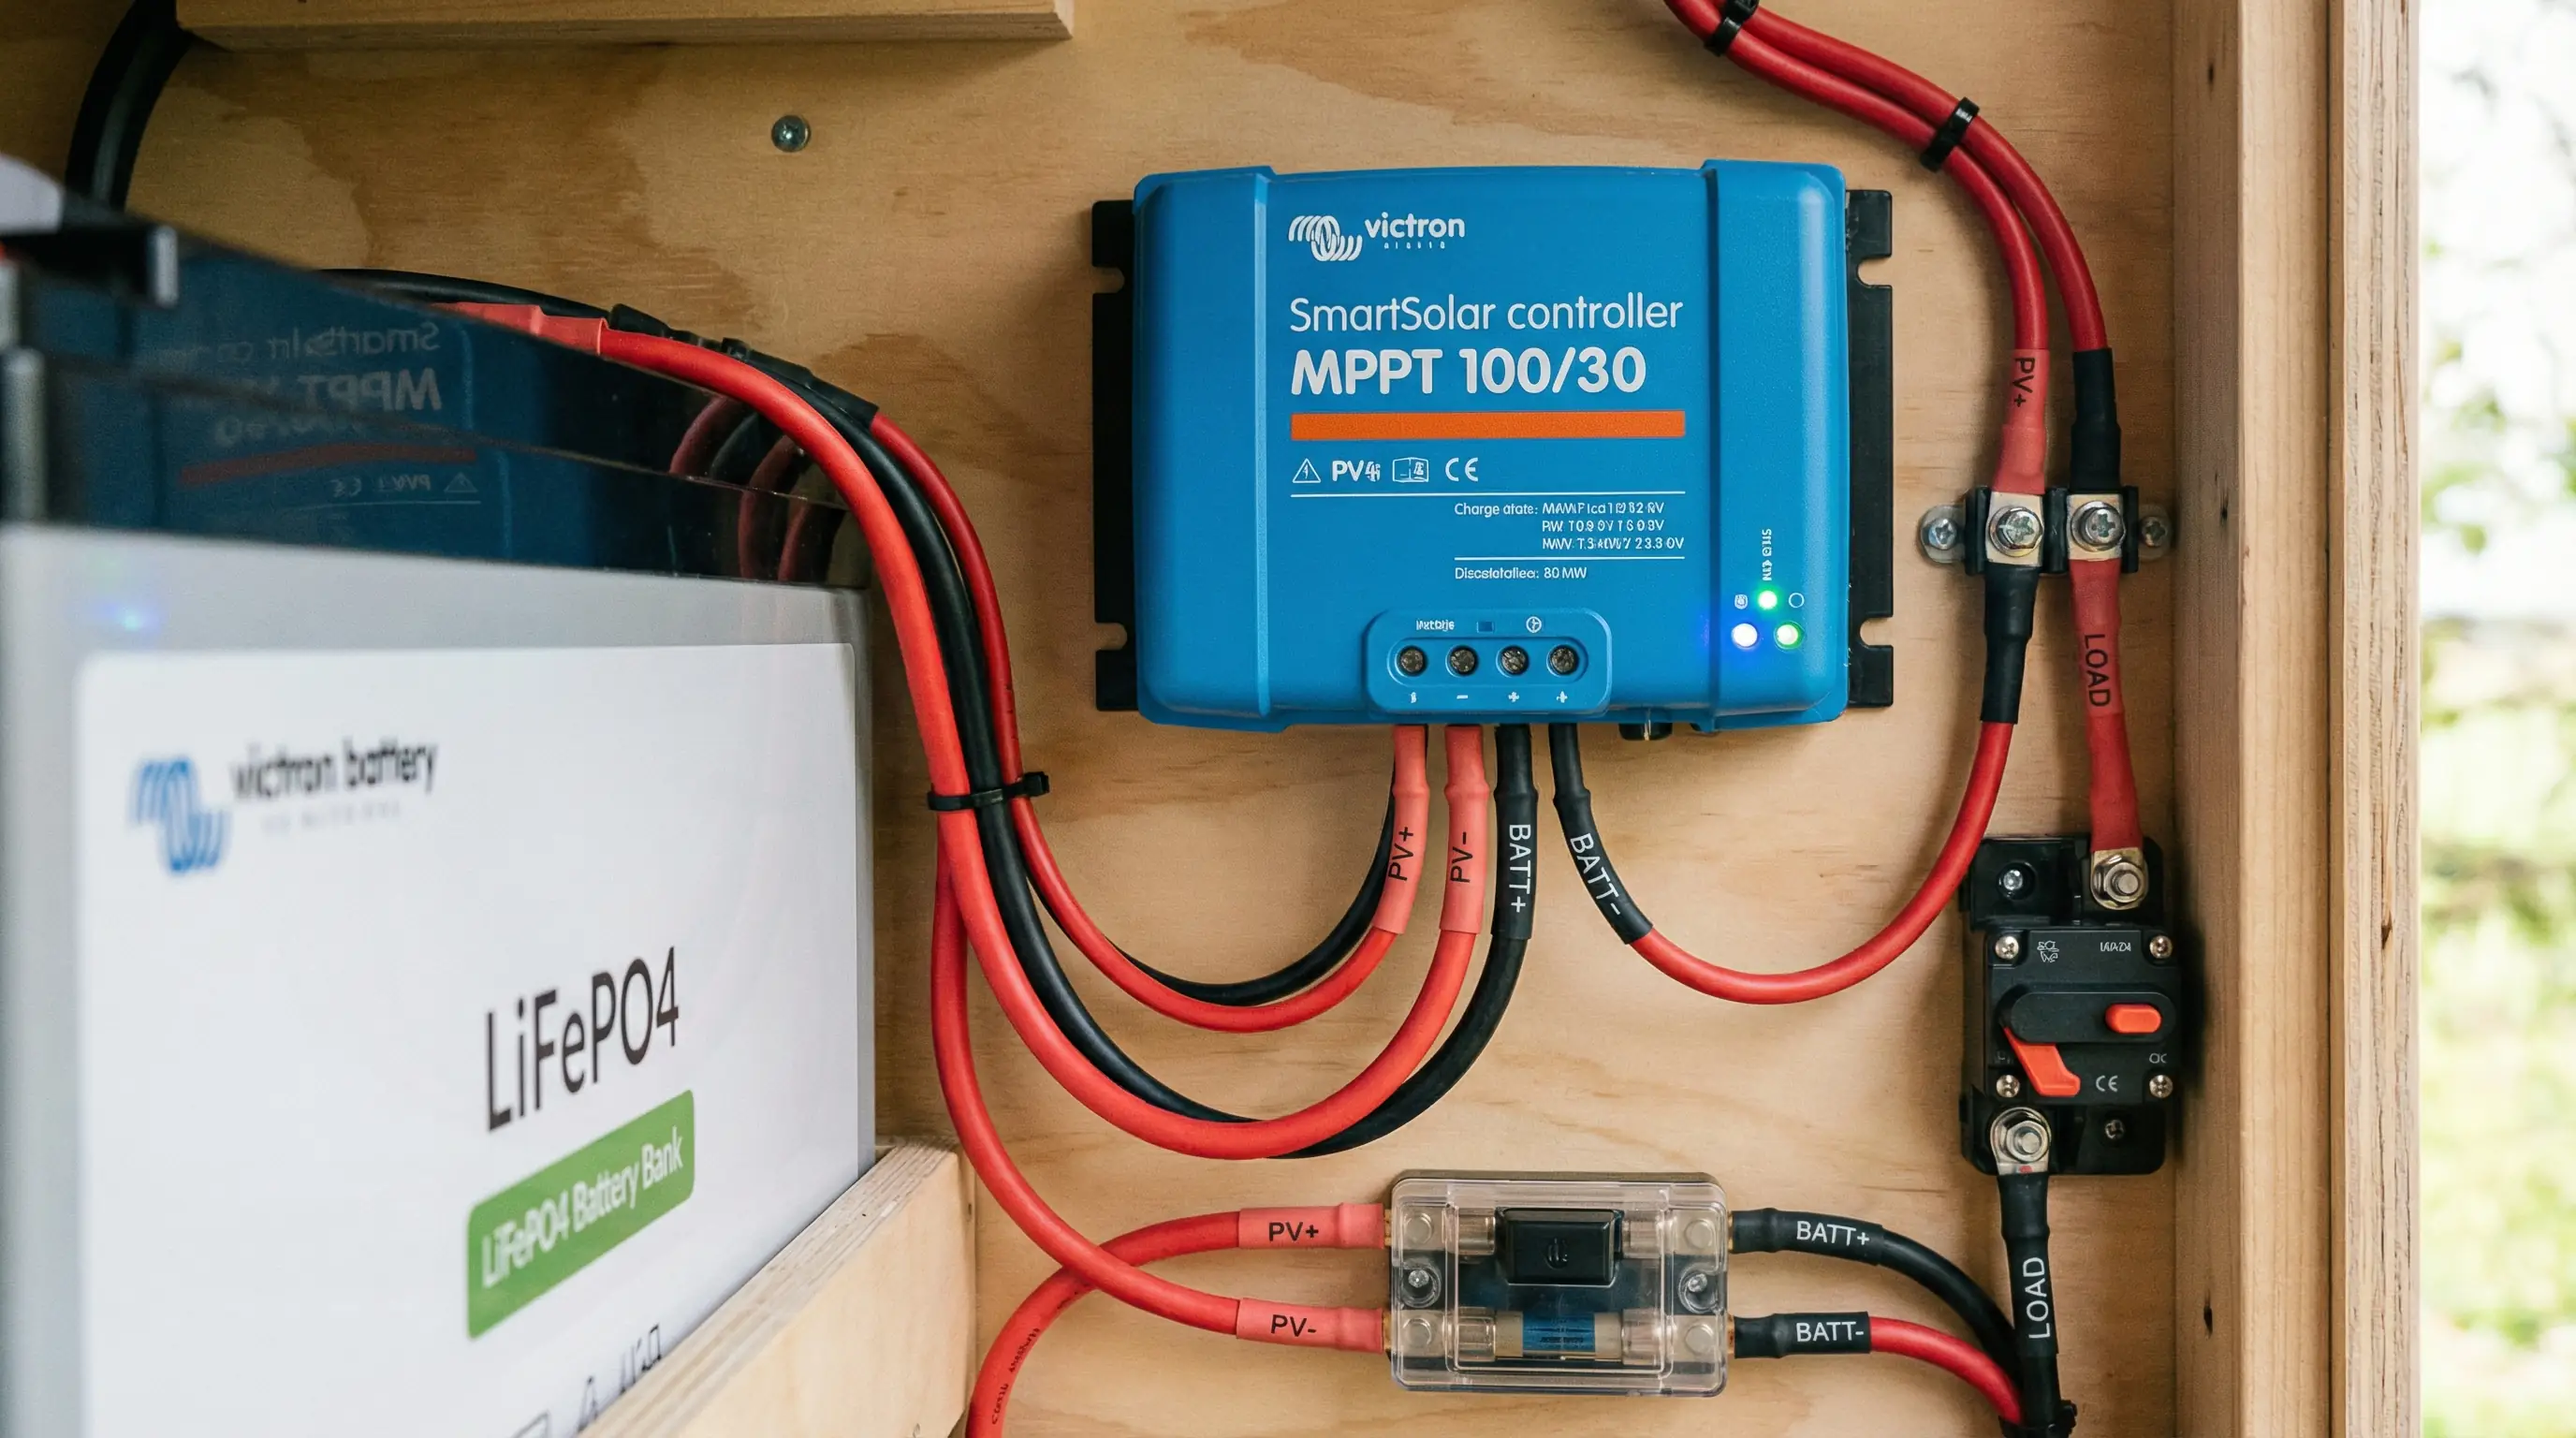
Victron SmartSolar MPPT 100/30 installed in the battery bay. Bluetooth monitoring through the VictronConnect app.
Adding the Second Solar Panel
The Revel roof has space for one additional 200W panel beside the factory panel. Sam and Alex used a Renogy 200W slim panel with a profile low enough to clear the Revel's pop-top lid. Roof penetration for the additional cable was sealed with Dicor self-leveling lap sealant — same stuff used for RV roof repairs, extremely reliable.
Both panels are wired in parallel (same voltage, doubled current) to the new Victron MPPT. The MPPT charges at 98% efficiency vs the factory PWM's ~72%. Combined effect: 400W of panels through MPPT generates more power than 600W of panels through PWM would.
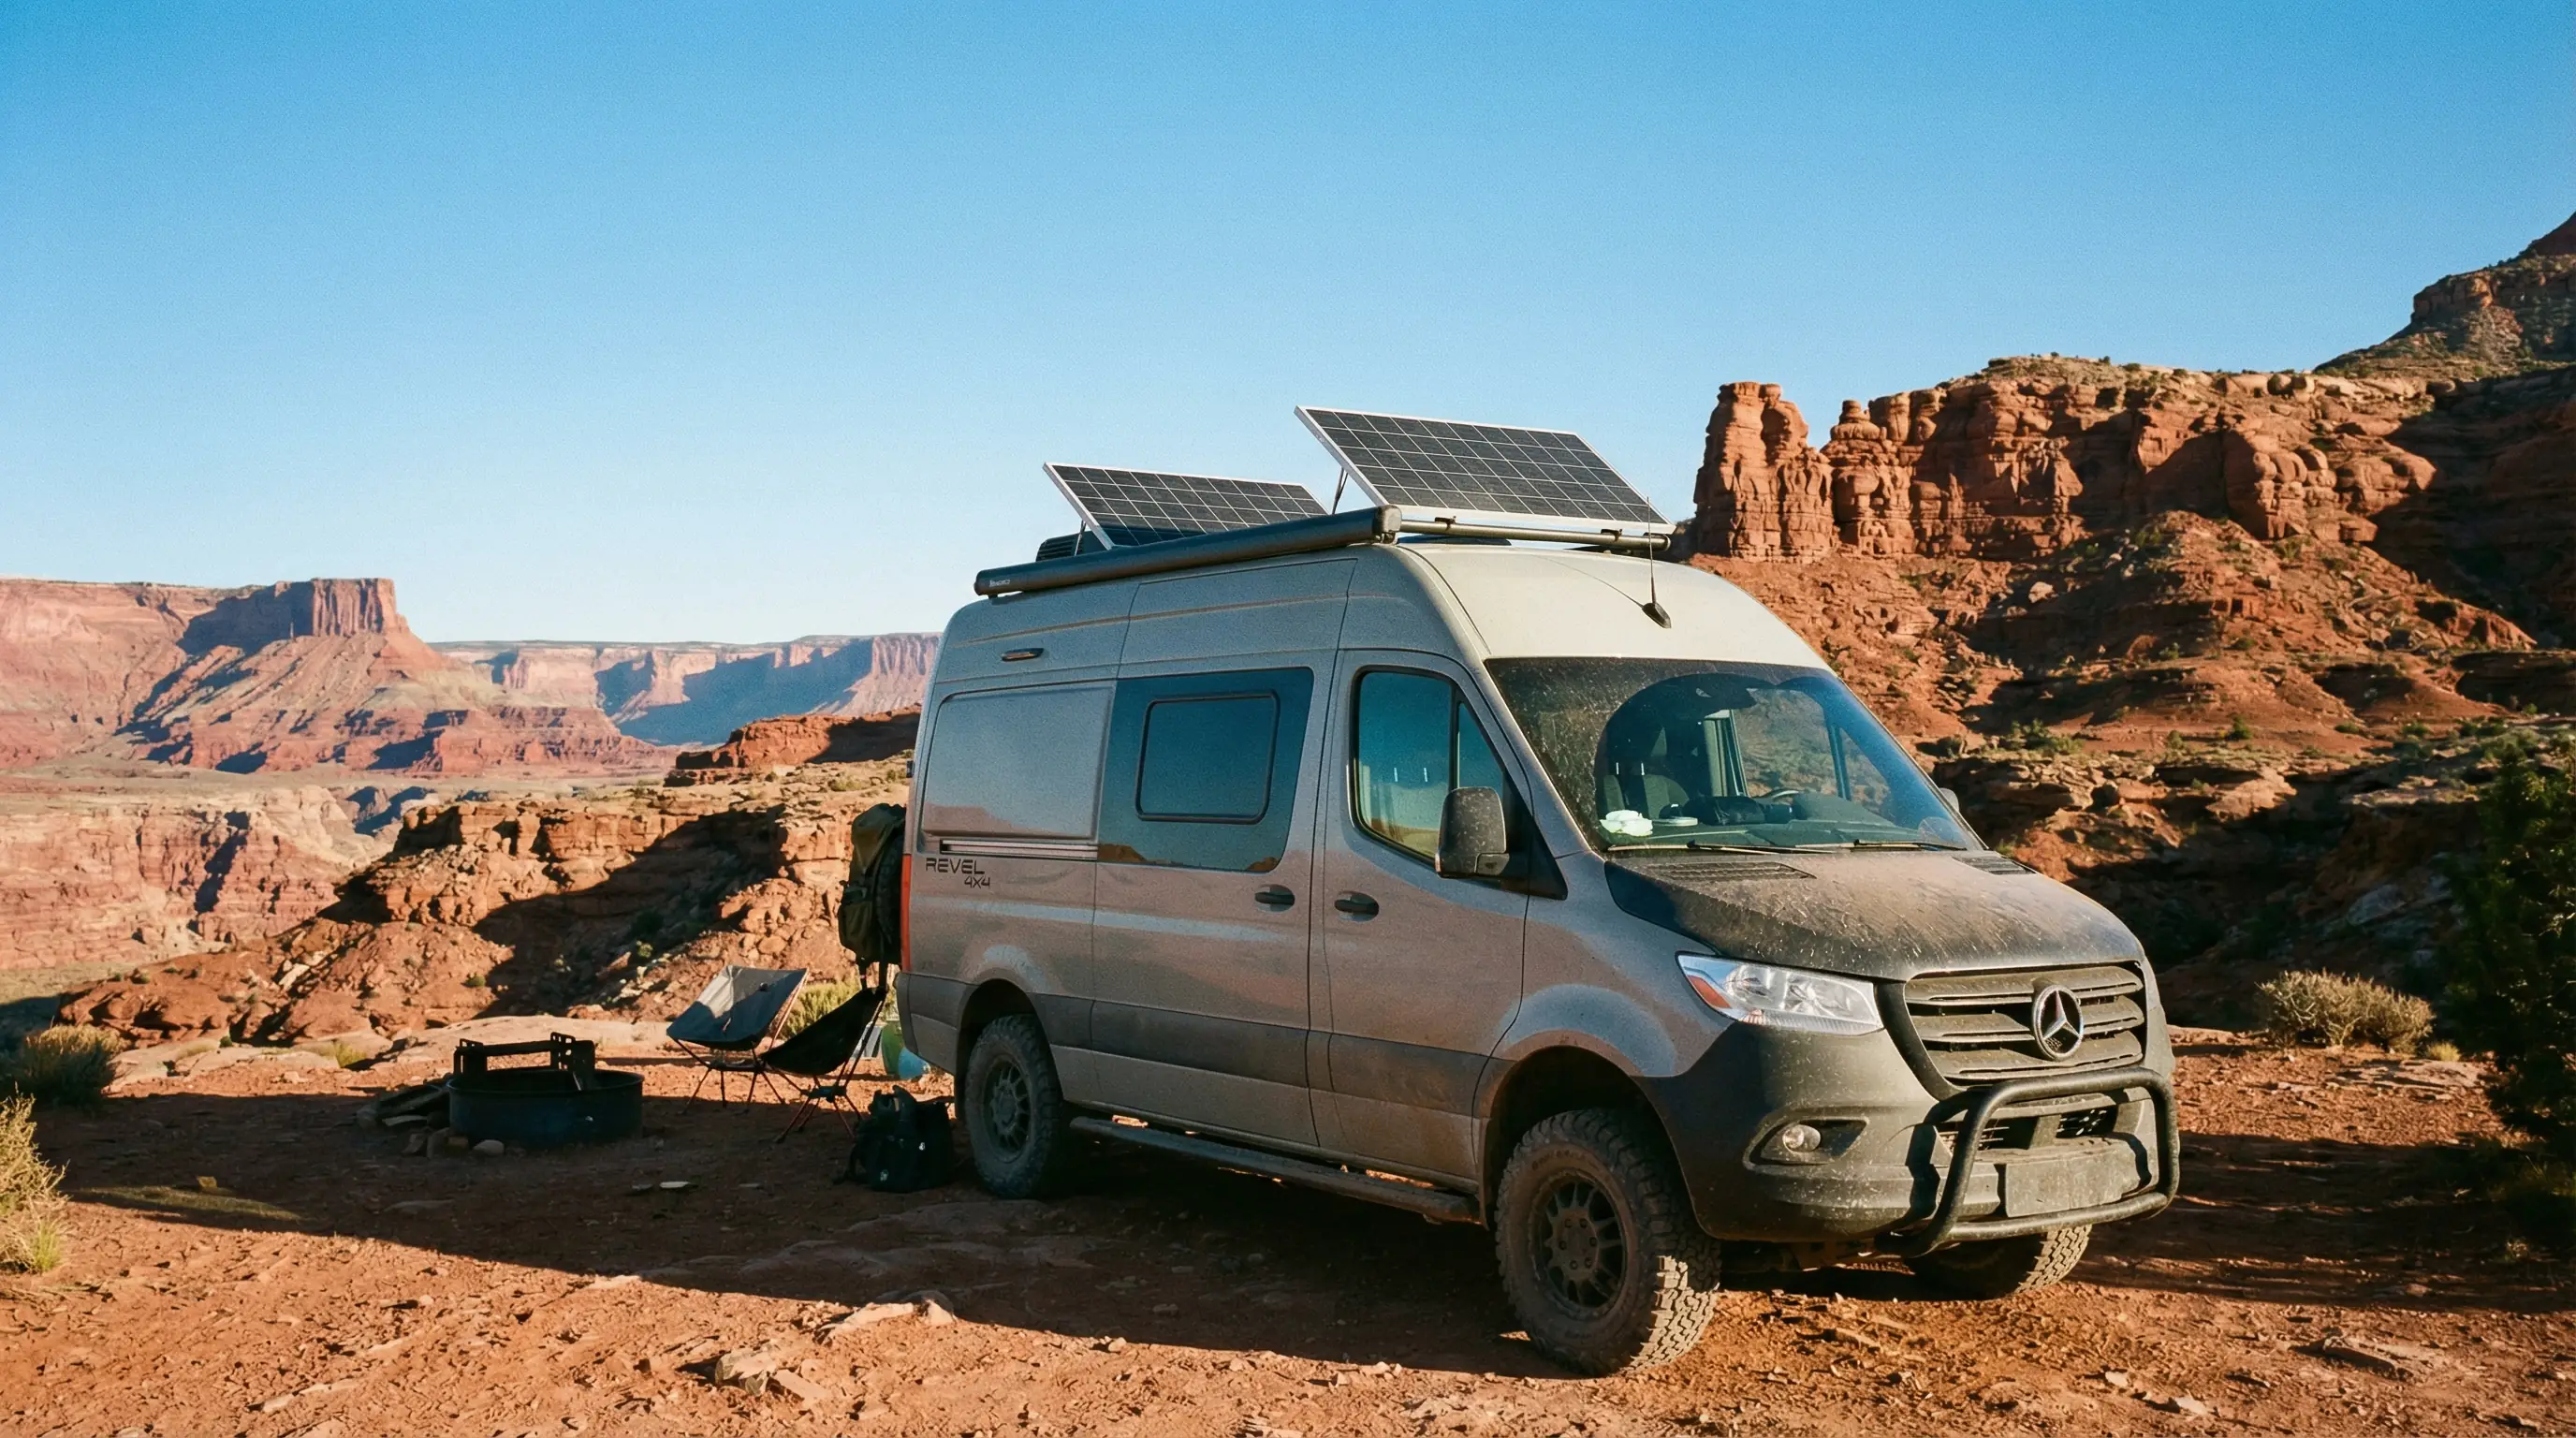
First real off-grid test: 9 days in the Utah backcountry, no hookups, battery never below 40% state of charge.
Full Cost Breakdown
| Component | Cost |
|---|---|
| Ampere Time 200Ah LiFePO4 Group 31 | $629 |
| Victron SmartSolar MPPT 100/30 | $168 |
| Victron BMV-712 battery monitor + shunt | $108 |
| Renogy 200W slim panel (second panel) | $188 |
| MC4 connectors + roof cable entry | $38 |
| Dicor lap sealant (roof seal) | $18 |
| Wiring, fuses, misc hardware | $84 |
| WFCO manual + DIP switch change (DIY, free) | $0 |
| Total Upgrade Cost | $1,233 |
The $4,200 figure on the builds gallery includes 2 months of Sam's time billed at a rough hourly rate since the installation took longer than expected due to routing the new panel wiring cleanly through the roof structure.
Was It Worth It?
Sam and Alex have put 14,000 miles on the Revel since the upgrade. They've done three trips over 7 days without any shore power. Before the upgrade, they were plugging in every 2 nights. The usable capacity went from ~50Ah (AGM at 50% DoD) to 180Ah (lithium at 90% DoD) — a 3.6× improvement. The MPPT vs PWM swap alone generates 20–30% more power from the same roof space.
"It's a completely different vehicle for off-grid travel. We would have done it on day one if we'd known how much it mattered." — Sam